
Review on Protect Your RV With Solera V000163273 White Slide Topper Awning - 5'6"! by Roberto Evans

Mount more than 3 " above slideout
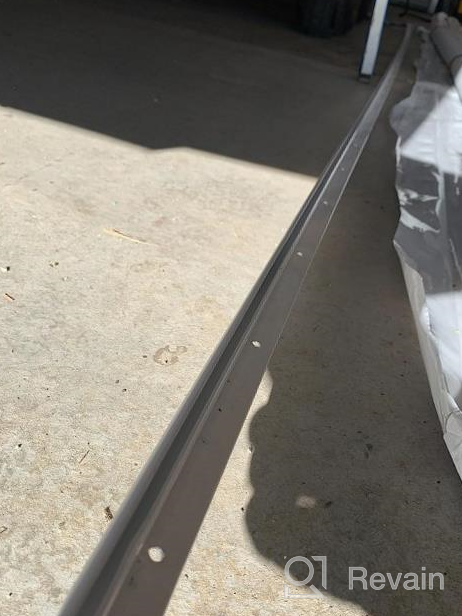
The installation for this topper was straightforward - take your time. Some major points are noted with a *- buy some 3/4" butyl tape to seal all the holes you are going to make in the side of the trailer* mount the rail on the trailer side 6" above the top of the slideout NOT 3" as the installation guide says.- make a line on the side of the trailer with the ends of the rail marked and centered.- apply the butyl tape to the supports to go on the slideout and install the supports. The butyl should squeeze out slightly.* mount the holders in the lowest mounting rails, NOT THE HIGHEST if you have clearance - I have 1" of clearance between the slideout upper edge and the awning doing this.- apply the butyl tape, leaving the release liner on one side to the railing.- get at least one helper and at least two step ladders.- align the railing to the line you drew 6" above the top of the slideout flange and starting at one end, press the butyl tape and the railing into place. You only get one shot at this so one person holds the railing off the side of the trailer, the other presses the railing with butyl tape down.- drive the screws into the side of the trailer thrug the railing GENTLY - very easy to strip out the screw holes.- spray silicone into the channel* helper holds up the awning and slide the bead on the awning into the slot. With silicone it should slide easily.- extend and retract the slideout a couple times, then pull on the edges of the awning and drive the screws through the railing on the side of the trailer and the awning bead so it doesn't shift.- add the lockscrews to the mounting plates on the slideoutI did not give this 5 stars because on my 13' topper, which only extends 18" the awning is not taut in the center and collects water This was caused by the 3" mounting height above the slideout that was recommended (if you call Solera the recommendation is 3" to 6" with a 3" MINIMUM). Which is different than what the installation guide says.You can tighten the awning once it is installed by reinstalling the locking pins, releasing one end at a time and giving the awning bracket a revolution or two to make it tighter.I like the awing but the instructions, also on YouTube for 3" above the slideout top will cause water to pool on top of the awning much less snow.
- STYLISH & ECONOMICAL — This slide awning is a practical, economical was for you to protect your slide-out from costly damage, and its stylish design won’t take away from the aesthetics of your RV
- May not fit all slide-out configurations
New products
Comments (0)
Similar reviews
Top products in 🚐 RV Exterior Parts

3 Pack 18" LATCH.IT RV Step Covers For Camper And RV Stairs - Fits 8-11" Depths - Keep Your RV Clean With Step Rugs

17 Review

Protect Your RV With LATCH.IT Shade: 7'X9' Zippered Screen Awning For Ultimate Wind Protection And Privacy.

15 Review

Keep Your RV Clean And Safe With LATCH.IT RV Step Covers - 3 Pack, 22" Wide, Best Fits 8-11" Deep RV Stairs - Protect Your Radius Steps Today!
21 Review

12V DC Electric Trailer Jack - 2000Lb Lift Capacity With Hard-Wire Connection

12 Review
Another interesting products

Air Compressor Lite
58 Review

Pack of 20 Super Bright T10 921 912 168 194 LED Bulbs 12V for RV Interior Lights, Trailer, Trunk, Camper, Boat, Motorhome Ceiling Dome Light - 6000K
18 Review

Upgrade Your RV Lighting With Ultra Bright T10 LED Bulbs - Pack Of 10, Pure White
44 Review

Premium 80W LED Headlight Bulb For Polaris Ranger Sportsman ACE RZR XP X2 400 450 500 550 570 700 800 850 - High-Performance Super White Driving Lights By AUTOVIC

20 Review