
Review on Stay Safe While Cycling With G Keni Smart Bike Tail Light - Auto On/Off, Waterproof, USB Rechargeable, And Ultra Bright LED Warning Back Bicycle Flashlight! by Greg Harris

Nice design and materials; seems like a good buy --- time will tell.
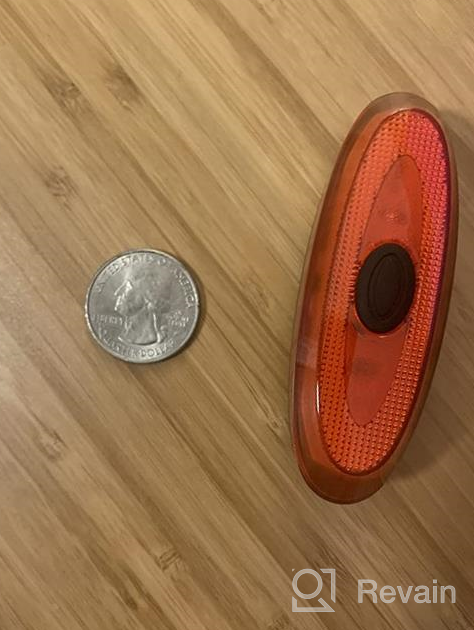
Apr 14, 2022:I like the build quality (metal) of the light. I charged it for about an hour before putting it on the bike.The main body of the light is threaded and screws into the socket of your choice. It has an o-ring which should keep water from getting to the USB connection inside while it is in its socket.I installed the seat-mount bracket in about 5 minutes. An allen wrench is included. When attaching the bracket under the seat, I didn't remove the bracket arms. I only loosened the bracket arms an equal amount on both sides until they fit, then tightened them. Though I didn't use the post-mount bracket, it seems reasonably durable, and I might adapt it for alternate placement while using the rack on the back of my bike.I'm adding photos that show details I would have found useful, including the English portion of the instruction manual.To adjust the brightness: from OFF, press 4 times to get to CONSTANT (no flash) mode. While in that mode, press and hold the power button. While holding it, the brightness level will cycle between LOW, MEDIUM & HIGH brightness. I'll include photos of the three levels. It can be done in the other modes, but it's easier to see the change in CONSTANT MODE.Edit: the photos don't appear in the order I put them which would have shown the three brightness levels side-by-side.June 18, 2022: In response to a question about a clip-on option, I'm adding a few more photos. The post-mount base can be removed from the silicone/rubber strap and used as a clip.
- Sports
- Not very versatile in terms of use
New products
Comments (0)
Top products in 🎾 Sports & Outdoors Accessories

Metal Frame Night Driving Glasses For Men: BIRCEN HD Anti-Glare Night Vision Glasses For Safe Driving

47 Review

6 Pcs Reflective Bands: High Visibility Running Gear For Women Men - Safety Straps Bracelets For Running, Cycling & Walking

46 Review

Foxelli Wading Boots: Lightweight, Rubber Sole Fly Fishing Shoes For Men - Grey
47 Review

Ultimate Fitness Tracker: Xiaomi Mi Smart 🏋️ Band 6 - 1.56'' Offers Unmatched Features and Performance
78 Review


