
Review on Get Moving With ROKR 3D Wooden Construction Trucks - Movable Vehicle Toys For Kids And Collectors! by Marc Oner

Fun Project! Sand Edges of All tabs for Easier Fit & Less Frustration to Fit Parts-Then Use Glue
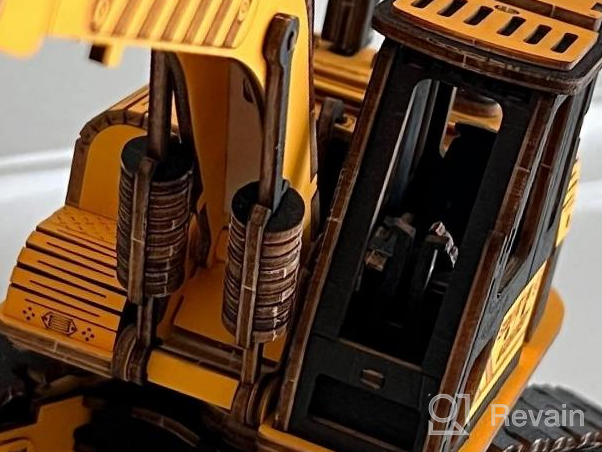
I have done several 3D puzzle models by various companies to test my patience as well as challenge my gnarled, rheumatoid arthritic "paws" at my age 69, having had RA since age 22. I felt very successful, though the fragile, "bendy" pieces for this kit were much more challenging and fragile than other kits. There were a few extra parts, I assume, in case pieces got broken(?) . I will include some notes below in reference to part issues or suggestions.I do like that both sides of the parts are painted, except for a couple that will only show where visible on the outside with the non-painted side glued to another part. (Glue won't stick to paint, so this makes sense.)The instructions are clear and understandable if one follows the sequence and pays attention to the warnings where to be careful and pays attention that there may be several order of steps within an overall step for which order to place parts on assemblies and sub-assemblies.My fingers have little strength and tend to become tired easily if I have to push or wiggle tabs to push into slots. I found that if I sanded at least one edge of the tabs, they would slide into the slots much easier requiring little to no force, for which I also used glue. As well, definitely be sure to sand the ticks that held the parts onto the laser sheets, as even these tiny ticks can affect fitting into places that are tight. Glue is definitely needed on many of the connections. I decided to put white glue on the ends of the tabs after fitted even if they were tight. Wiped with my finger to get the glue into the seams and smooth off across the ends of the tabs. White glue dries clear, and I just felt it would give some reinforcement, plus glue would fill the seams.My gnarled fingers struggled with the fragile, "bendy” pieces on this kit more than other kits, but still found it successful to sand the edges of the tabs and to start at the middle, then work toward the bending pieces' ends--one side; then the other to attach. They don't have to stretch far, but I found it much easier to sand the tabs to be less tight and almost loose, apply glue and hold before moving to the next tab or moving to tabs on the other side of the middle—working as said, one direction to an end; then the other direction to the end. For me, holding the sides of the "bendy” pieces was less stressful on the part than trying to push from their tops. Also, sanding the tabs on the A5s made the flexible roller pieces (D1's) go on very easily. Once assembled, I also put glue on the ends of the tabs, and along the seams where the roller parts (D1's) come together just for reinforcement and reassurance for myself.On some kits with "bendy” fragile parts, I have put water on the side that needs to curl; I didn't do that with these parts as much smaller. I had the most trouble with B6; it broke just below the hood as it bent toward the front bumper, but such that glue filling the seam worked and doesn't show once dried clear. (Of course there was no 'spare' part for that piece.)Note: The holes in the horizontal front of Parts A9 and C22 do not line up; however, nothing is going to be placed in these holes to need to line up. I debated whether to make the slots deeper, but hesitated seeing bendy parts to be added that may have created an issue with making slots deeper on part C22.Note: The A25's (2) must line up as A11 will be going through B1, and both A25's sit on top of A9 with A23 holding the bottom of A11 from underneath the bottom of A25. This keeps the hitch up to place the roller even with the tires to run properly.This was a 7-1/2 to 8-hour project for me, over a few days—not the 2.5 hours indicated in the item's description. Time to assemble does not bother me as I tend to be slow and meticulous with sanding the ticks, and for this model, I sanded all the tabs for ease of construction versus tight, forceful fitting.I will concede to 4-stars for details being impressive, sturdiness once assembled, and some struggles with assembly. It is quite stable, The ease is "relative" as directions were good; easy if patient, and sand tabs or openings (sanding side edges of tabs is easier), so as not to force fittings. Overall, the directions are good for part numbers to use, order of assembly of the sub-assemblies. But, I also think there were too many flexible, "bendy” parts--and especially no spare for part B6.Pictures--Step1 done--Working on step 4--Step 4 done--Step 5 done--From back--FINISHED--From front--FINISHED--3/4 view--FINISHED
- RELAXING HOBBY - It's a rewarding hands-on activity for both teens and grown-ups. Concentrate on your hands. Take your time. Enjoy a pure joy with your family. The exquisite outlook will definitely wow everyone who sees it.
- The construction of the trucks might not be as interesting to some children as other types of toys
New products
Comments (0)
Similar reviews
Top products in 🤔 Brain Teasers

Get Ahead With Vdealen'S 8-Pack Of Exceptional Speed Cubes! Ideal Gift For Teens, Kids, And Adults On Christmas And Birthdays!

24 Review

6-Pack Speed Cube Set: 2X2 3X3 4X4 Pyramid Skewb Ivy Stickerless Puzzle Cubes - Perfect Christmas/Birthday Gift For Kids, Teens & Adults!
32 Review

ROBOTIME 3D DIY Solar Car Puzzle Kit - Fun Arts and Crafts for Teens and Adults - Top Learning Toy and Birthday Gift (Curiosity Rover)
25 Review

Wooden Roller Coaster Marble Run Puzzle - ROKR 3D Mechanical Model For Self-Crafting, Decoration, And Educational Gifting
21 Review
Another interesting products

1000 Piece Mandala Jigsaw Puzzle - Creative Colorful Black Fantasy Bgraamiens Color Challenge Puzzle
17 Review

Mudpuppy Magical Friends 4-In-A-Box Puzzles, Ages 2-5, Each Measures 6”X8 - Chunky Puzzles With 4, 6, 9 And 12 Pieces - Difficulty Level Grows With Child – Beautifully Illustrated Puzzles, Multicolor
16 Review

Colorful Venice 1000 Piece Jigsaw Puzzle By Colorcraft
20 Review

Explore The Arctic With Mudpuppy'S Colorful 64 Piece Puzzle For Kids - Find 40+ Hidden Images Of Animals, Fish, And Birds Living In The Arctic!

25 Review